Finding time for self-care can pose a challenge in our fast-paced modern world. However, there’s one simple and enjoyable activity that you can indulge in from the comfort of your own home: a DIY manicure. Not only is it a great way to relax and unwind, but it also allows you to express your creativity and take control of your nail care routine. In this ultimate guide, we will walk you through the steps to achieve salon-worthy nails at home.

1. Gather Your Tools
Before you begin your DIY manicure, make sure you have all the necessary tools at your disposal. You’ll need a nail file, buffer, cuticle pusher, nail clippers, cotton pads, nail polish remover, base coat, nail polish of your choice, and a top coat. Having these tools readily available will enhance the smoothness and efficiency of the process.
2. Prep Your Nails
Begin the process by eliminating any previous nail polish using a non-acetone nail polish remover. Gently wipe your nails using a cotton pad until they’re clean and free of any residue. Afterward, trim your nails to the desired length and shape them using a nail file, ensuring to file in a single direction to avoid the risk of splitting and weakening the nails.
3. Soak and Pamper
Fill a small bowl with warm water and add a few drops of your favorite essential oil or a gentle soap. Immerse your hands in warm water for approximately 5-10 minutes to soften the cuticles. This step not only provides relaxation but also makes it easier to push back and remove the cuticles later.
4. Tame the Cuticles
After soaking, use a cuticle pusher to gently push back the cuticles. Be careful not to apply too much pressure to avoid damaging the nail bed. If there are any hangnails or excess cuticles, carefully trim them with a cuticle nipper. Remember to be gentle and precise.
5. Buff and Shine
Utilize a buffer to gently polish the surface of your nails. This helps to smooth out any ridges and gives your nails a healthy shine. Avoid over-buffing, as it can thin out the nails and make them prone to breakage.

6. Apply the Base Coat
Applying a base coat is crucial as it creates a smooth surface for your nail polish and prevents staining. Employ a thin layer of base coat to each nail, ensuring complete coverage. Before moving on to the next step, make sure to allow the base coat ample time to completely dry.
7. Get Creative
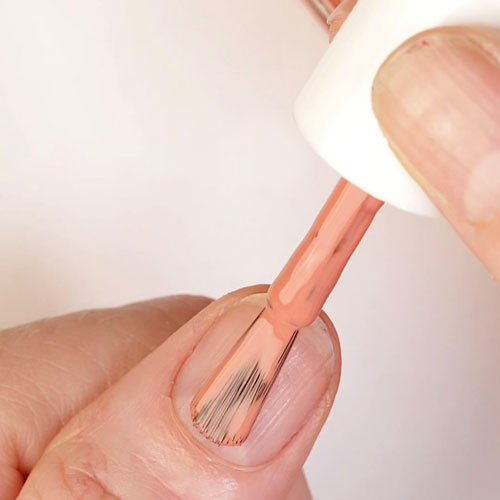
Now comes the fun part—choosing your nail polish color! Select a shade that matches your mood and personal style. Apply two thin coats of nail polish, allowing each coat to dry before adding the next layer. Make sure to cover the entire nail evenly for a polished look.
8. Seal the Deal
Once your nail polish has dried, it’s time to apply the top coat. The top coat adds shine, extends the life of your manicure, and protects your nails from chipping. Apply a thin layer of top coat, making sure to seal the free edge of your nails for extra durability.
9. Finishing Touches
After your DIY manicure is complete, clean up any excess nail polish on your skin using a small brush dipped in nail polish remover. This step gives your nails a professional and clean finish. Ensure your nails are completely dry before partaking in any activities to prevent smudging.
10. Maintain and Hydrate
To make your manicure last longer, apply cuticle oil or hand cream regularly to keep your nails and cuticles hydrated. Avoid using your nails as tools to prevent chipping or breaking, and wear gloves while doing household chores to protect your nails from harsh chemicals.

DIY Manicure Conclusion
By following this ultimate guide to a DIY manicure at home, you can achieve beautiful and salon-worthy nails without leaving the house. Bear in mind that practice leads to perfection, so don’t be disheartened if your initial attempt isn’t flawless. With time and patience, you’ll become a DIY manicure pro, enjoying the benefits of well-groomed nails whenever you desire. So go ahead, and treat yourself to a relaxing and creative nail care experience right at home!
